The Upcycle Circle
My MIL had a box of clothing she was giving away, so... I raided it! Then I had a magical idea. Here are seven shirts I pulled. For each shirt I upcycle I will use the remnants of a different shirt to finish or embellish it.
Enter.... THE UPCYCLE CIRCLE!!! So, for each shirt I will use the remnants of the shirt to it's right! Going around in a circle!!! Are you ready?
The Upcycled Button-Up Shirt is HERE.
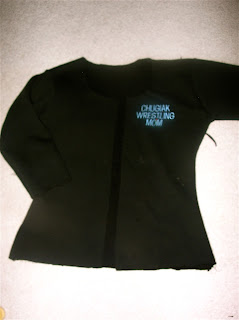
Here is the sweater and the leftovers of the plaid button up. (I hate my crappy camera.) And... before you get to mortified by me cutting my my MiL's shirt supporting my hubby when he was in high school... I have another at my house and remember... She had already decided to give it away!
First I cut up the shirt like so and discarded the bottom and that funky skinny piece in the middle. I will admit I kind curved out the middle a little more to make it more fitted and flair out a the hips.
Then I cut the neck like so and cut a straight line down the middle.
Then I sewed on the sleeves... Again... sorry for my crappy camera.
I used the extra plaid shirt to create a pleated trim at the arm.
Here is the painful part... I pain-stakingly picked out the lettering. The sun is shining weird through the window here. I swear you can't see the lettering very well. The rose I have yet to get completely out, but...

Here is the gigantic button and the Bias Tape tie. It is stitch closed in a loop to hook over the button and I tied the ends in a bow over the stitching.
I ended up cutting a 4 inch slit in the middle bottom on the back to add some ruffles there too. On all the ruffles I used black bias.

Here is a shot of the front!
Here is a view of the back.
Ain't I cute! lol I love this Blazer!
Total Cost: FREE
Black sweater: MiL's Giveaway Stash

Here is the sweater and the leftovers of the plaid button up. (I hate my crappy camera.) And... before you get to mortified by me cutting my my MiL's shirt supporting my hubby when he was in high school... I have another at my house and remember... She had already decided to give it away!
First I cut up the shirt like so and discarded the bottom and that funky skinny piece in the middle. I will admit I kind curved out the middle a little more to make it more fitted and flair out a the hips.
Then I cut the neck like so and cut a straight line down the middle.
Then I sewed on the sleeves... Again... sorry for my crappy camera.
I used the extra plaid shirt to create a pleated trim at the arm.
Here is the painful part... I pain-stakingly picked out the lettering. The sun is shining weird through the window here. I swear you can't see the lettering very well. The rose I have yet to get completely out, but...
I used more of the plaid to pleat around the neck. This weighted down the neckline to create a collar and magically covered up the crazy leftover rose!!! Yeah!

Here is the gigantic button and the Bias Tape tie. It is stitch closed in a loop to hook over the button and I tied the ends in a bow over the stitching.
I ended up cutting a 4 inch slit in the middle bottom on the back to add some ruffles there too. On all the ruffles I used black bias.

Here is a shot of the front!
Here is a view of the back.
Ain't I cute! lol I love this Blazer!
Total Cost: FREE
Black sweater: MiL's Giveaway Stash


No comments:
Post a Comment