My Mother-In-Law bought my son and hubby some zipper ties when she went to teach in China. I thought they were so awesome I had to make one! Imagine my frustration when the zipper I selected kept snagging on the fabric!!! Rggg... that is when I discovered all that silly work of sewing in the zipper wasn't necessary! Rgg again... Anyways...
What I figured out is pretty simple. I took tons of pictures because it is a little hard to explain in a post! But, seriously... this is so simple it's ridiculous! I sent some to my brother on his mission, made some for my nephews, my hubby and my boys! Went a little crazy with this one.
First pick your tie and put it up to whoever is gunna be wearing it to figure out the length. Keep it folded there.
Cut straight across at the fold. And set aside the bottom portion.
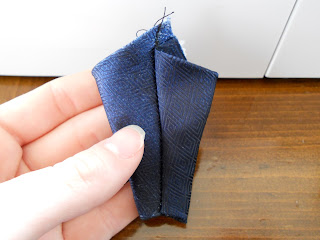
Using the remainder we are going to create the "Knot" portion of your Tie. Fold it over slightly farther than your would like the widest part of the knot at the neck. Then trim again. Then I sewed a straight stich diagonally across this piece from about where my pointer finger to my thumb.
Make sure your right sides are together and that the end where my thumb was has a hole large enough to shove your tie through.
Then flip this right side out and turn the seam to the middle. (Honestly... most of my have wider tops... I just like the look of the fat knot, but... this is up to you.)
Next place your faux knot seam side down, touching the right side of you main tie.
Fold the sides of your main tie under and sew the two together. Make sure you are only catching the BACK part of the knot piece.
Then flip your main tie back, over, and shove it through the knot.
Next take the leftover long piece and trim of the point about 3-4 inches. Then fold the longer piece in half length wise and stitch it closed.
Pictured above is the BACK of the main part (note the seem on the faux knot). Pull up your tie a little near the top of the knot and stick and end of the skinny long piece through each side and down through the knot.
Then put both ends of the long skinny piece together and wrap the pointy part around them. Make sure right sides are touching and your point is on the top.
Then straight stitch and pull the pointy end down. Press to help it reshape.
Next you are going to stitch the front portion of the knot to the front portion of the tie so your skinny neck piece will stay at the sides. I used a hidden stitch to do this. Since I ended up making my knot a little to skinny with this one the top part of the tie shows when unworn, but... With a fatter knot you should be able to squeeze this top part smaller.
I also used a hidden stitch on the back. Making a "T" shape, I stitched the back of the knot to the actual tie and I stitch opposite sides of the tie together, pretty tight. This keeps the tie closed tight when worn.
Here it is on! He isn't wearing Sunday clothing, but you get the point right? Let me know if this makes to sense. Once you have done it once it is pretty easy and you can whip through them!


No comments:
Post a Comment