Friday, January 13

Free 2017 Printable Planner


Better late than never!  But here it is!  The 2017 Printable Planner!
My amazing brother fixed the links so you can easily download everything!

This year I went a little more simply on the color scheme.  Black and gold.  Simple, but fabulous!  Right?  There aren't to many changes to the layout.  I kept it regular 8.5 x 11 size and I changed the weekly format from vertical to horizontal...  You will have to let me know what you think.

There is one crazy thing I did this year...  I cut ALL my paper to 7.25 x 9.5!  I did like the larger size planner, but I found it hard to fit into my diaper bag...  Before I started creating my own planners I purchased an Erin Condren Life Planner.  I LOVED the size.  So, I suppose if I am going so far as to actually create my own I may as well make it the size I want!  If anyone would like a tutorial about how I resized the pages and cut the paper, let me know!

I also added Jan 2018 in case I do this same thing next year...  LOL

Now on to the planner!!!
 Here is the first page!  It's mostly a fancy page I put on the first part of the monthly/weekly download  to of set the pages so that when I print front to back.  LOL  But it's Tolkien!  Everyone loves Tolkien right!
 Here is a preview of the monthly layout.  You should be able to print the monthly/weekly front to back on your printer if it has that option.  If not... have fun flipping your pages back and forth.  I do LOVE my printer and did that the first year I create it.  LOL  So no judging here!
 Here is a shot of the weekly pages.  The only major change is that I switched the days to horizontal from vertical.  The "To Do" part of the left I changed to hexagons more to add character to the page since there isn't as much color.
 If you blog here is a simple shot of the planner part I created for me!  Heres hoping it helps me stay organized for this year!
 This will have a note portion printed on the back.  Its already in the printable ready for you!  I plan to laminate this after I fill it out!
 I am putting this at the front of my planner!  I am not usually one for major resolutions but I do like making small goals for myself.  They end up changing throughout the year as life happens.

 Here is a part of my planner that is WAY more important than I thought.  I know... it's probably not the safest thing to have in a planner, but as mine lives on the counter I figured it was semi safe.  Plus... EVERYONE in the house has ended up using it!  My kids flip right to it to get their passwords for school or games on the computer.  LOL  They are to young to hack into my bank account, but maybe one day they will need their own.
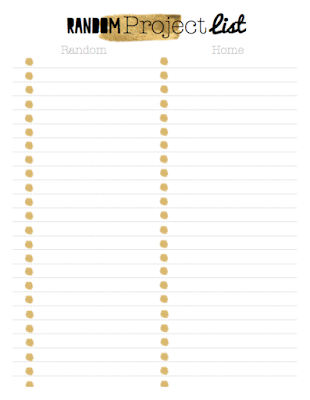
 I always keep a running list of things that need to get done.  Big, small.  Gifts or invites to make.  Furniture to paint or rooms to reorganize.  I keep them in line by having a random list and a home list.
This has been nice to have when making weekly meal plans.  I added a breakfast/lunch part so i have quick ideas for when people are home.  Most of the time it's just me so when the kids are home on the weekends I am scrambling to fix something up!  lol

Here is a pic of what the new note page looks like!  I usually print a couple for the back of the planner.  They are also on the back of some of the other planner pages.

OK are you ready for the planner pages!  Click on the title of the page you want below to download!  The monthly/weekly is divided in half so to make the file smaller.

January - June
July - January
2017 Goals
Recipe Favs
Blog Planner
Project List
Password Log
Cleaning List
Note Pages


SaveSave

Monday, January 9

Primary Secretary Assignment Sheet

I realize this is late, but...  Better late than never!

Here is a simple calendar for those of you who happen to got to my church.  The group for little guys in our church ages 3-11 is called Primary.  The children are given a chance every now and then to offer a prayer, give a scripture, or present a short talk during the kids meeting block of classes on Sunday.

Below is a printable I use to help me keep track of who has had a turn and when!

CLICK HERE to download.  

Wednesday, December 28

Trident Gum Thank You Wrappers


Hello all!  Moving and baby and craziness here at our house!  But I wanted to share something simple I made up! I created these to give as gifts to people who help sub in the primary classes at our church.  They would work well as thank yous for teachers or friends too!  

This was one of my first real attempts at using a REAL photoshop application.  I think it turned out pretty great.  Could be better but...  It works for what we need it!  Enjoy!
To start I purchase a few packs of these off Amazon.  They were just over 5 bucks each, so the overall cost isn't to bad.


the template below!
They should wrap right around the gum.  I only have one hint for you on putting them together.  

I wanted to be sure that whoever got the didn't have to remove the paper I created while still using the gum.  To do this the first piece of tape I slide underneath the open tab as pictured below then...
Placed the front part of the image where I wanted it on the front and folded the side near the tape over.
Then I just had to wrap the rest around and tape where it landed!
Here they all are finished and ready to sit in the closet until needed!  Everyone loves gum right?


Friday, January 22

ExStraw Special Valentine Printable

With a baby due on Valentine's Day I have gone into full nesting/prep mode.  None of my babies have ever come super early but... I have my hospital bags pack(complete with treats for my mom and the hubby), the kids overnight bag packed(hoping to add a surprise present in there for them), and I am crazily organizing and cleaning the house so everything will be easier when baby girl comes!  (NO... we don't have a name yet.  This naming thing is hard for us!  LOL)

Part of my preparation has included getting Valentine's ready for the kids.  I am sure that I will go into labor the week of all the kids parties so whatever projects the teachers send home will be more than enough for the hubby to tackle while I am at the hospital or home recovering with a cute squishy baby!  When you throw in homework...  Well...  lets hope the teachers are lenient that week.  My mommy will be here to so I am hoping that my crazy organizing will help everyone involved so I can just relax.  LOL

This is the EARLIEST I have EVER had Valentine's done for my kids friends!  Usually I have them help a little more than this year, but I was going for quick and easy.  This year they all got the same thing to pass out, instead of me letting them pick.  They don't seem to mind!  Why have I always done 3 different Valentine's?  *Palm to forehead...

First off I ordered 2 sets of THESE CRAZY STRAWS off Amazon.  Living in ND... Amazon becomes your best friend.  LOL  As you can see, there are TONS of different colors and shapes, the straws seem study and I am sure they will be a hit!
Then I created a print out that was simple.  All my kids have to do is sign it!  No need to make sure each individual classmate has their name on it right?  I did create 3 different colors, per each childs request.  
THE DOWNLOAD FOR THE PRINTABLE IS AT THE END OF THE POST!
One boy requested blue. 

One boy requested red.
And my daughter wanted pink!
This was the longest part.  I had the kids sign them before even cutting them out.  I let them cut them out even though...  It wasn't that hard and I knew I could cut about 5 sheets at once and be done WAY faster, but... I like to let them help.  I did do all the hole punching!  I have a Crop-a-dile where I could stack about 30 of them together and punch all at once.

Next I just slide them onto the straws!  
*HINT:  Slide the bottom of the straw onto the Valentine first, sliding it a little higher than you want it to set.  THEN slide the top part of the straw into place.  These straws are just bendy enough that if you need to bend the straw to get it on there you can!
SEE!  Simple, easy, cheap, and DONE!  
Hope at least one more person can use these than me!

CLICK HERE for the ExStraw Blue!
CLICK HERE for the ExStraw Pink!
CLICK HERE for the ExStraw Red!

Tuesday, January 12

Primary Secretary Helpers

I recently got called at church to be the Secretary in the Primary Presidency.    At the church I attend we are not paid to teach or help we are asked and called.  The Primary Presidency is responsible for making sure that all the children ages 18 months to 11 years old have a teacher and that that the teachers are taken care of.  We are also responsible for those who teach Cub Scouts and Activity Days (the younger girly version of a Wednesday youth activity for girls 8-11).  On Sunday we teach a lesson to half the kids (Junior Primary) during the second hour of church and the other half (Senior Primary) during the 3rd hour of church.    Have I confused you yet?

Anyways, as Secretary I am responsible for taking roll, getting the numbers to leadership at the quarter and making the assignments for talk, prayer, and scripture for the kids.  Those are my major things anyways.  There are a few little ones as well.

To make my job a little easier I made a chart where I can write down what child did what on what Sunday.  This way the weekly assignments are a little more spread out, I have an easy access to see what parents to call and remind that week, and an easy way to see how long it's been since a child had a turn speaking.


CLICK HERE to download
the Dated Assignment File

I also created a very simple substitute sign up list.  This will help me create a list of other people at church who don't mind subbing if one of our teachers can't make it that day.  We encourage our teachers to ask parents of kids in their class first, but sometimes that doesn't work out!  I will probably have to update my list a lot as we have several military in our area who move.
CLICK HERE to download 
the substitute list.

We really appreciate when people volunteer, especially since many times it's last minute RIGHT before class starts.  As a thank you the secretary before me create some cute gifts for those who help. I updated it a little and changed the words.  This is nice because your could pair it with Andes Mints, regular mints, mint patties, or Junior Mints!  I haven't actually made any because there are a TON in the closet.  But here is the printable I created!
CLICK HERE to download
the sub thank yous.

There are a few helpers.  Hopefully I can help out at least one other secretary with these!  I know that usually people like to start this stuff at the beginning of the new year.  Hopefully I am not to late to help another!


Monday, December 28

Wonky 9 Patch Tutorial


I found this post buried deep in my draft posts from WAY back in June of 2012.
This is a tutorial for a Wonky 9 Patch.  It's a fun variation of a basic 9 patch...  There is a little more thinking involved so you still end up with squares, but... if I can explain this right it shouldn't be to hard!
At the end of May in 2012 we THOUGHT the military was moving us away from Florida so we took a big splurge and headed to Disney World for a whole week!
Part of our fun there was getting signatures and meeting all the different characters.  My kids were in heaven.  Instead of doing signature books I decided that signature quilts were the way to go!  
See that post HERE.
After the fun was over it was time to figure out creative cute ways to make awesome blankets!  The one below was for my son.  He is into outer space so the starry print was great for him!
All my original signature "squares" were 5x8 inches big.  I cut more out of other fabric I had purchased.This quilt is just a variation of a normal 9 patch.  I just couldn't get myself to do a normal one.  
For this quilt I was careful to place my signature squares in the corners.  Each original block is 9x9, just like a normal 9 patch.  Mine is extra wonky because I used rectangles instead of squares, but you could TOTALLY replicate this process with squares as well!
My original blocks are rather large so I only made 8 of them.  I then paired them off, making sure that the colors in each of the middle spaces were different within each pair.  Notice how the top middle and bottom middle in the top square are blue and the one below it has yellow.  The VERY middles are different colors as well as the left and right middle for each pair of squares.
I cut each pair together, laying one on top of the other with  right sides up for BOTH!  In a normal 9 patch you would cut right down the middle horizontally and vertically.  For a wonky 9 patch you place your ruler and cut like I have pictured above.  You start at the left of the top middle square and end at the right of the bottom middle square.
WITHOUT MOVING THE PIECES move your ruler to make the "horizontal" cut.  This time you will slice from the bottom corner of the left middle square to the top corner of the right middle square.
When you separate them out it should look like this!  Next comes the swapping!  If you notice my bottom left and top right signatures were upside down in the original square.  Here is where that gets fixed!  Since you are probably NOT making a signature quilt you won't have to worry about that step, but  still be sure to swap where I show you!
First that the bottom left of the bottom piece.
And swap it with the top right of the top piece.
The top right of the bottom piece...
is going to go the bottom left of the top piece.
After swapping sew the "vertical" pieces together first, then press!
Then sew those two pieces together on the "horizontal".  (Not sure why this whole picture is upside down.  I apparently uploaded it that way and I can't find the original on my computer!)
Do this sewing for both pieces.
After you have done this for all you pairs you can choose how to sew them all together for your finished quilt top!
(See if you can spot the difference between this picture and the one below.)
I bordered my quilt with scraps of leftover fabric.  I know I used HUGE blocks, but the concept is the same if you are doing smaller 4 inch squares.  Just sway where I showed you and you should be fine!
(Did you spot the difference?  HINT: I had to do some MAJOR unpicking to fix it.)

I will post pictures of the completed quilting when I can!  I just realized I don't have pictures of any of my kids completed Disney Quilts!  This was before I machine quilted myself and I sent them to my momma.  She was just learning at the time but did a FABULOUS JOB!  They deserve their own post!