Did you know you can make a stencil with Mod Podge? Well you can! I was put in charge of a simple sewing project for Enrichment Night at our church. (A meeting where everyone gets together and is cratfy.) To spice up my assignment I decided to try creating a washable stencil with Mod Podge!
First you will need an embroidery hoop and some sheer fabric. Yes... mine is fru fru... but it's all I had! Put our sheer fabric tight into your hoop.
Next trace our your design on some paper. For those of you who may not know... CTR stands for Choose the Right!
It's hard to tell, but I traced this on the inside of the hoop, where the fabric was touching the paper.
The I flipped it over and painted around my design with Mod Podge!
See... all done, but not quite dry. You will have to see what I was assigned to sew while you wait! First I chopped of the bottom portion of a jean pant leg.
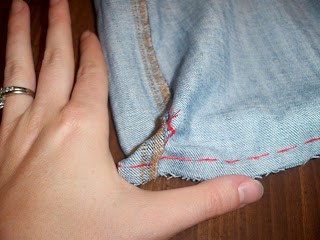
Flip that inside our and use embroidery thread to straight stitch along the bottom.
This is a tricky part to show with pictures. I created a bottom to the bag by pinching a corner, to create a triangle and straight stitching a line perpendicular to the first one.
Here is the side of the bag, with the straight triangle showing... if your could see through it you would see the bottom straight stitch running up and down behind... perpendicular to the stitch you see here.
I then flipped it right side out and folded over the top to create a place to thread my ribbon through.
I cut a tiny slit in the side so that when I finished this step I could snake a ribbon through as a drawstring.
Using more embrodery floss I stitched several angles going all the way around!
Then I went back the other way to make cute "X's" across the top. This is where I snaked my ribbon through. I just pinned a safety pin to one end and slowly worked it around. I double knotted the ends.
Here is where I used my homemade stencil! I simple set it down where I wanted my image and then carefully painted over the top!
When I was done I just lifted up the Mod Podge stencil! Did end up touching up a few areas, but... What a fantastic way to create a stencil that you may want to use over and over again! I simply rinsed it off and it dried REALLY fast since the fabric I used was so thing!


No comments:
Post a Comment