Ok Emily and Tamisha! This was TOTALLY FOR YOU! I miss you two! And... Aurora needed something in her school colors for spirit day that I could sew FAST!
I started with ONE standard size pillow case and some wide width grosgrain. I also stole some elastic out of some pants in my upcycle pile. The width doesn't really matter, but... I like about 1 inch to give it some strength.
Open up your pillow case and fold it in half length wise. First cut straight along the CLOSED part of the pillow case. How much you cut of depends on how long you want your dress/romper. Next, on the seam side of the pillow case you are going to cut a rounded L shape for the arm hole. Mine went about 5 inches down and about 1.5 in. How far you go down depends on how wide you elastic is. You are going to need room to make the casing for your elastic at the top.
Here is one of the arm holes opened up to a u shape. Left is from Right is the back side of the case.
I folded it over twice about a 1/4 inch and straight stitched a hem for the under arm along the entire "U". I did this on both sides.
After hemming the arm holes I folded over the top about a 1/4 inch once, then again about 1 1/4 inch and pinned in place. I then sewed a straight stitch to close the casing for the elastic. To determine the length of the elastic I measured across her chest from armpit to armpit and took off about 2 inches.
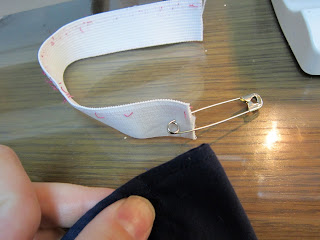
Use a safety pin to snake the elastic through the casing.
When the elastic is almost through I sewed the end of the elastic. Make sure the right side of the ribbon is facing the front of your dress!
Then pull the elastic right to the inside edge of the dress and sew the ribbon and elastic to the edge.
I cut the ribbon like so and burned the edge to melt the shape in place.
If you want a pillow case dress STOP HERE! lol I put it on Aurora yesterday morning and she said, "It's cute, but... can you make this bottom part shorts?" So... I eyeballed how long I wanted the shorts while the dress was on her. I then folded it in half.
And cut up the fold.
For this part I sewed a straight stitch along both sides. I did the twice for double strength and then zigzagged the edges so they wouldn't fray.
The top is elastic so she can just jump right on in. You can sewed down the knots of the ribbon if you like so they are easier to wash and wear.
I had to do fast hair yesterday so I could make a dress into shorts! lol As you can see... she was excited!
Side view...
Back. Kind looks like a pencil skirt here doesn't it! lol


Thanks Jess! I can't wait to make one!
ReplyDeleteO my! Soo Cute! Don't think I could do it?
ReplyDelete