


I started this bag with big ideas. In my laundry room is a plastic bag that hangs on a knob and serves as trash collector for lint and dryer sheets. I have had a plastic bag in every home we have lived. When it fills I chuck the whole bag. So, my idea here was to make a plastic bag cover to match The Lonely Sock Bag. It didn't end up quite how I wanted, but it serves it's purpose! Also... in hinds sight, there is a MUCH easier way to do this!

Since I was making a trash bag cover I decided to use an actual trash bag as a pattern. I cut open the bag and laid it flat.

I used this to measure 2 pieces of fabric for the outside of the bag, 2 for the inside and 2 pieces of batting. Notice I only cut them square. I didn't use the handle portion of the bag. I guess I could have, but... I didn't! The handles on the original bag folded several times and I didn't want to do all that folding and pinning and have bulky handles.

Next I took my 2 outside fabrics and laid them right sides facing and sandwiched them between 2 pieces of batting. Then I sewed up the to outer edges, leaving the top and bottom open.

I did the same with the inner fabric, only minus the batting. I sewed up the 2 outside edges, leaving the top and bottom open. I then left the all wrong sides out and laid the inner fabric on top of my batting/outside fabric combo.

Next I got a bag that was still sealed on the bottom and placed it center on my fabric. The I grabbed both layers of fabric and folded up one side a little less than the fold of the bag and pinned on the bottom.

I did the same on the other side only this time I flipped it under. I don't thing this really matters only... I think I would have flipped them the same next time cause... It doesn't really matter!
Anyways... then sew along the bottom edge.

Next I flipped it right side out by grabbing the inside layer and one outer layer and... flipping them!

See... flipped and funky shaped!

Next I pinned some matching binding along the top seams with right sides touching and stitched along the top seam.

After folding it up and over to the other side I pinned and stitched it down with a decorative stitch!

I used the same decorative stitch to make some handles. I wish I had lined these with batting... oops. they r just fabric folded over a couple of times.

I made sure they were the same length as the plastic bag handles before stitching them in place.
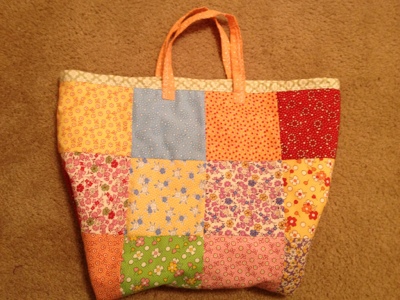
Here it is done... the first time! It is cute... and it works, but it didn't quite turn out how I was thinking.

See... I even took a cute finishing photo. But... it just didn't seem quite how I wanted it. But I went through all that work and it took me 2 months of staring at it to figure out exactly what to do to fix it in my mind!

I took some elastic and placed it between the outside edges of the bag. Stretching the elastic as I sewed it down made the edges ruffle a bit when I let go.

See! Edges ruffled and cinched in a bit did it for me.
No comments:
Post a Comment