Anyways... I had my 2 lovely babysitters over to help with the kids so I could be glued to the computer. As payment I showed them a few crafty tips and we created these twilight flip flops!!! Thank you Billie and Karen! My plan was to help them create a flip flop they could switch out the "bling" on. While we all love Twilight you might not want to wear them on your feet everyday. (Or maybe you would...!) I've had this idea for a while and here was my chance to see how it planned out!
Here are our flip flops before. Boring right! We started our flip flop make over by hot gluing cute black ribbon to the tops straps. (Remember... our plan was to keep them simple so that we could switch our several different flowers!) Also in this step we hand sewed a velcro square to the place where our toes squish in! After you complete this you can embellish you flip flops with pretty much whatever you can sew velcro onto! Now... onto the twilight part.
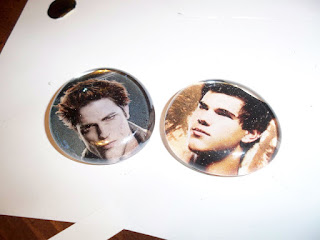
Oh so handsome right! First decided you want on your feet and select their photos from the internet and print. You don't want the pictures to print any larger than an inch. But... this will depend on how big the gems are that your put over your pictures. I don't take sides so I did one of each. To create these follow the post on our sight here! Just don't do the magnet portion. If you want to stop here then just glue a piece on velcro where you would glue your magnet!
Karen did something similar, but wanted to use bottle caps. Just follow the same steps and make sure you cover the tops with the glue to so they will stay pretty!
We backed our men with some Yo-Yo flowers. They are easy and don't take much fabric. Remember, again, the plan was to make several so we could switch the out! A tutorial on how to make the Yo-Yo's is here! We embellished away after that.
Here are Billie's! With an extra gem shown on the flip flops!
Here are mine with just a regular gem and velcro.
Here are Karen's! Notice on her's she put the cute black ribbon around the edge instead! I wished I had bought more!
See, we aren't totally obsess with Twilight! I even decorated some for my little girl!
Here is a close up of the velcro on the backs. For the flowers we hand sewed them on. The plain gems are the Goop Glue shown in the magnet tutorial. And on the Flip Flops... well they are really more tied on since we didn't stitch through the flip flop itself. I stitched the edge and the went under the strap to the other side of the velcro and then back again.

A word from the wise. When creating interchangeable Flip Flops have lots of supplies as it can be addicting! Notice that Karen has about 4 different ones in front of her in the picture and Billie has 6! I think they liked them!


No comments:
Post a Comment