Tuesday, November 30

Headband Holding Hair

You may notice the headband from a previous post.  Here is a tutorial on how to make it!
My daughter loves headbands, but unless it is held down somehow she can't seem to stand them!  For some reason if I "fix her hair" she doesn't even think about it!  Silly girl!
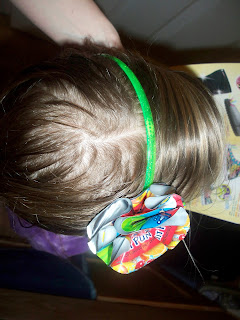
I start by parting her hair in two places.  One long line parallel with her crown where the headband will lay.  The other on this part is where the flower is one the head band.  If your headband is plane then you can skip that little part!
Next, plop the headband down.
I then grab 2 pieces from the front part of the hair.  One from the left of the flower and one from the right.  I bring them under the flower, but over the headband.
Then I grab a small strand from the opposite side of the headband, right underneath the flower.  I twist, twist, twist the 3 sections together, just so they hold.  The clip is just there so I could take a picture.  Normally I just hold onto it with my hand so I can grab a little elastic.
I then put an elastic around the 3 twisted sections as close to the flower as I can get.  I kinda push it up a little so this one is hidden under the flower!  Do you recognize the headband yet?
Aurora has very fine hair and everything seems to fall out, so I put two more ponies in.  I just grab a section of hair from the front of the headband and then a smaller section from the opposite side.  I stick the 2 parts together with an elastic!
This is a very simple and quick way to get a headband down.  you could braid the front sections, or braid the 3 parts hanging down in the back... Be creative!  This is a fun way to spend time with your daughter!

Here is a tutorial for the Capri Sun Flower Headband again!

Saturday, November 27

Baby Brace or Cast Cover

We were at a little girls birthday party in a beautiful split level home.  My older 2 were down in the den aread watching the magic show.  I was up by the kitchen and living room area so my baby could play with toys away from the screaming fun!

I was standing by the stairs, watching the show, when 1 year old Grifin came and stood next to me.  I thought nothing of it.  He goes up and down the stairs in our house all the time.  I guess in the rush of fun he though, "Huh...  I'm just gunna step down instead of slide on my tummy."  Yeah... he can't do that!  There were only 5 little steps so I attempted a calm rush down the stairs to comfort what I assumed was a just scared baby and take him away from the party so the others could have fun.

We calmed him with ice cream and then I took him into the living room to check body parts.  In my head I new something wasn't right, but kept telling myself he was ok.  It was a pretty slow and short fall, but it was straight forward.  I check his legs.  He could walk.  I felt his torso and he never winced.  Then he got up, walked away and started playing with toys again.  I still felt weird.

Then... he tried to crawl and reach for a toy and fell FLAT on his face.   I knew something was wrong.  I attempted to stay calm and called my husband at the fire station to see if he could get off work so I could take Grifin in.  Shockingly they let him go.  They all now me.  So does my husband.  They knew I wouldn't call if I didn't feel something was actually wrong.

By the time I got to the ER and 1.5 hours later, his arm started to swell a little.  He did great in the ER.  He truly has the best personality.  He was calm and happy with all the nurses.  He did his normal "studying"  of everything.  (He is so serious.  He stares at everything with a death look.)   He let the doc and 2 different nurses hold, poke, weight, and take his temperature.  During the x-ray he hardly needed holding.  He sat very still and made cute baby noises.  The only time he really got upset was when the doc came in.  He was sitting and turned to use his arm to get up.  We BOTH saw his little arm collapse at the wrist.  They gave him yummy pain meds.

Somehow in that little fall his rubber-band baby bones were hurt.  He has a buckle fracture in BOTH his radius and ulna near his wrist.  I don't know much about bones, but when I saw the x ray I knew it wasn't good!  The doc was pretty shocked and said he is actually going to need a cast for 6 weeks!  They gave him this pretty cool splint until Monday.  They put a sticker on it so he could pick that instead of the wrap.   Of course he yanked in off in the car ride home, but then fell asleep.  I fixed it when we got home, changed his diaper and put him in bed.  He never even woke up!
 Needless to say I felt awful and like the WORST mommy all night.  The only thing that kept me from crying was that Grifin is pretty sensitive.  I new if I cried he would be even more worried.  Rgg...  So... while making this doesn't fix him, it for sure made me feel better!
 I started with an Adult size sock.  I got this from Target in the dollar bin.  I had it in my stash to attempt some cute sock monkeys, but.. I needed it!
 I cut the top part off.
I flipped it inside out and zig zag stitched the edge.
I then put it on him to measure where the base of his thumb was.
 I was going to do a regular button hole, but... sock's don't agree with my already ill sewing machine.  I'm shocked it let me finish this project so easily!
 Here is the end of the new Brace Cover.  I suppose you could just shove a sock over it, but... I'm crazy. The doc said it was important to be able to see his fingers.  You need to check that he is still moving them and that they aren't blue!
Here is a side view.  He has been wearing it about 4 hours now and hasn't bothered with the wrap since! Or course, pain meds and snuggles help too!
Plus...  He is a sucker for suckers!


On My List {Part 1}

I'm so excited!  I've never participated in a blog hop before.  I'm kinda interested in seeing how this works!  

As part of the blog they have given us certain topics to choose to blog about.   There are two things I have been wanting for a while.  I'm not sure if I will get them soon, but... I WANT THEM!!!!  (giggling) The first is one I'm posting because it's more in keeping with the theme of my blog.  I'm going to do a different post for the second one, simply because it's something I didn't know a whole lot about.  I thought the information I used to educate myself would be interesting to others looking for something similar!

Here is what is on the top of my list!
Picture via Bizrate.com
A Brother Project Runway Limited Edition LB6800 Sewing AND Embroidery Machine!

Right now I have a Singer Esteem from Target.  It is great.  It was my first new sewing machine and it was a gift, so I can't complain. But... I use it ALOT and as a result it has decided to become ill from use! It will only stitch for about an inch before skipping stitches or the thread breaking.  Poop.  I'm pretty handy so I tried everything to fix it.  It seems to just need lots of naps!  I have no clue what is wrong with it but... I've been wanting a fancier machine so, perhaps this is my Singer's way of saying , "GO FOR IT JESS!!!!"

I did my research on the machine before selecting it.  There is one VERY similar by Brother that doesn't have the Project Runway logo.  Here are a few reason why I wanted this one. 

  • The machine is one sale right now!   Both similar machines are.  This one.. not so much, but the difference I call.. reason number 2!
  • The AWESOME bag!  Mine right now doesn't have a container at all!  It will be nice to put fabric in a bag, loop the handle over the suitcase handle and... ROLL to sewing madness with a baby on my hip!
  • Embroidery functions.  I've wanted something that can do more stitches than the 35 I can do now.  I love fancy stitches, but I would love to be able to embroider my kids names.  I don't think that I will be huge into that function for more than the names.  I figure if I really like it, then I will get a big Embroidery machine later!
  • Brother Brand.  Yes... there are many awesome brands out there.  My mom is a Viking Husqavarna person, my Aunt Iris wants a Pfaff one day (Don't we all?).   For the brand question I went straight to my mom and Aunts!  Brother is a reliable brand that is not TOO over priced for me right now.
  • Warranty  Uh... I'm pretty sure that in 25 years they will invent a sewing machine that flies me to Hancock and sews things for me.... So... this machine will last until I no longer need to sew!  lol
  • Project Runway  Ok.. so it wasn't a deciding factor AT ALL  because the 2 machines really are the same, but... this one comes with the bag I want and  OH SO COOL!  I would love to be on Project Runway!  I've never shown many of the things I truly create on here.  I wanted the site to be a fun place to learn and by inspired.  Perhaps I will post pictures to help inspire you?  
Anyways...  I am a pretty flexible person.  I'm open to opinions in this area so... let me know what your favorite sewing machine is!  What would you upgrade to if you had a Singer Esteem?  (Which... while I love it... it's pretty easy to upgrade from!
Click here, eventually for part #2 of On My List!

~~~~~~~~~~~~~~~~~~~~~~~~~~~~~
I am participating in Infarrantly Creative and Tatertots and Jello’s Blog Hop for a chance to win a Mint Cleaner. It is the revolutionary machine that cleans your hard floor surfaces for you.
Click here to join the blog hop and a chance to win!Mint_cloth2
The Mint Cleaner is available at the following places:

Thursday, November 25

Capri Sun Flower Headband

Funny Story First!

I was attempting to think of ways to make this post a little more Christmasy, because... 'tis Christmas Time! In doing so I was going call the post "Head" Ornament.  But... that gave me another totally cool Christmas idea, so... 
Here is a little Summer to keep you warm during the colder weather!
 I first cut the top part of the empty bags, opened them, cleaned them out, and set them out to dry.
 Then I used a small cup to trace circles on the bottom part.
 Cut out the circles.  One of them I cut slightly smaller than the rest, not by much though.
Get a needle and thread ready.  Flatten out your smaller circles.  These two will be your base.
 Your first layer will be all silver circles.  Start by folding one in half...
 Then in half again.  Place the point in the center of your base circle and stitch in down.
 Do all 4 silver circles.
 Tip: Make sure the folds are all facing the same directions.  Notice the double folded part is touching the single fold of the one next to it.
 Do the same thing with the colored ones.  I wanted the tips  of the petals to have those little cherries on them.   Be careful to fold the colored ones in the same places to create your pattern.   Unless.. you are going for that eclectic look!
 Stitch them all down... On this layer I had the folds facing the opposite direction AND I didn't layer them directly on top of the other triangles.  The center of each of these is lying over top where 2 bottom ones meet.
 Maybe this picture shows that last step a little better.  Also here I sewed a button to the middle!
I thought about covering the headband with a cute ribbon, but I LOVE the plastic raw materials look of the headband with the plastic drink bag flower!  Anyways...  Here is where we are going to attach them. It's pretty technical, so pay VERY close attention!   Pictured is the back of my flower, headband, and then a small circle scrap of the plastic bag.
FIRST  put a glue dot on the flower, THEN stick the headband where you want the flower touching, THEN squish the smaller circle on top.  

See... very technical.  If you mess it up I'm gunna be mad cause I gave you VERY good instructions!  lol  And yes.. feel free to call me a dork.
The last step would be to put it on!  Turned out pretty cute right!


Monday, November 22

Turkey Snack {School Safe}

Again it was Aurora's turn for snack time at school!  I really wish that we were allowed to handle the food so I could bake something fun, but... I understand.  Allergies.. health safety...   It's all good.  I'm getting fairly good at figuring out how to create cute snacks without touching the food!  They may not be healthy... but... they are fun!
 Here are the main things I started with.
 I tried several different ways of getting those silly Tootsie Rolls to stick.  Scrapbooking Dots didn't work.  I think it's the waxy wrapping paper.  Anyways...  I got my cookie and 4 Tootise Rolls ready next to a hot glue gun.
 Place 4 tiny dots of glue of the far end of the Tootsie Rolls and blow for about 5 seconds so it's not... too hot!  (Or... take a picture, cause that's what I did here!)
 Then plop 'em on the top part of your cookie, wrappers on everything.  Try and arrange the in a curve.
 Next, hold down the end of a bigger Tootsie Roll and put glue on the top half.  Then plop it down right below your "feathers".

Next you are going to want to CLICK HERE to download my printable of the Turkey Heads.
 
I used 2 double sided scrapbook squares to place my turkey face.
Here they are!  All lined up and waiting to be eaten!

Saturday, November 20

Beauty Makeover Birthday

My daughter has been wanting a Beauty Makeover Party since she say the Tooth Fairy!  You know...  there is the seen where he has to watch the boy cause the mom and the little girl are going to a party... Yup!  A Beauty Makeover Party!

I was shocked that I was able to do this so cheap.  I understand that  most will NOT be able to do it for this price, but I wanted to post the ideas.  My goal with most things is to try and use what I have available.  All of the decorations were simply things I found around the house.  I tied a ton of her hair ribbons to the chairs and used some pink fabric to lay across where the guest prizes and cupcakes were.  I put a bed sheet over the table (it was gold) and put the flowers that her daddy got her on the table too!   I tend keep my eye out at the thrift stores about a month before hand to save more pennies!  I try to spend a little where it matters and reuse what I have where it doesn't!  

  While I love throwing cool parties... they are over rather quickly.  I think the point is to try and use things you already have around the house.  Little girls don't judge!  They will be to excited about the make up!


As the guests arrived we started with massages!  Every girl needs a massage, perhaps not a 6 year old, but... still!  They were so giggly and ticklish it was a perfect start!
Cost
FREE!!!!  
We used an electric massager we already had.  If you don't have one you could get those  hand ones from Michael's you see all the time in the dollar bin.  Perhaps if could be a gift for all the guests?

Once everyone arrived we began the party with food!  We wouldn't want to mess up our make up right? 

To create the swirl effect I put globs of the white frosting in 3 separate cups and added dye to create the Purple, Pink and Red frosting.  I then put 1 gigantic glob of each color on the top.  I smoothed the outside edge so it would be covered with a butter knife and then used the tip to swirl.  There is a TON of frosting cause Aurora never eats the cake!
Cost
Box Mix of Strawberry - 1.39
2 Cans Vanilla Frosting - .89 each

Since all these Tu Tu's were hanging in the window, they were the first thing each girl asked about as they came in the door.  So... after cake came Tu Tu's!

Most the tulle came from a GIGANTIC black and pink Tu Tu I made myself for an Adult Prom.  The yellow tulle came from the same Tu Tu after I took off the pink to lend it to a friend who added more black and then some yellow.  (She was a Bee for Halloween)  
Cost
3 Packs 1 inch Elastic - 1.29 each
1 10 yard Roll Sparkly Pink Tulle - 1.50
Rest of Tulle - Free from my stash!  
I couldn't tell you the initial cost because I bought most of it over a year ago.  But... the Sparkly Pink was on sale at Hobby Lobby.  So..  about 6 Bucks max a Tu Tu if you don't get sparkly and a shop sales?


 Next we moved on to the Make-Up center!  Here is where they truly went crazy.  My silly girl, who was obsessed with this party for about 2 months, was insistent that she needed a red nose for her clown makeup!  So much for the beauty part?  I let them go for it.  I figured it was more fun for them to just play and be cute little girls.

The seating is just some floor pillows covered with a pink fleece blanket.  The mirror is my full length one that I brought down and put on it's side!
Cost
1 Case of Make Up - 2.99
(It had several different blush and eye shadows and was CHEAP!!!)
1 Case Sparkly Lip Color - 1.99
(Same cheap knock off brand as the face stuff
Q-Tips for applicators - .89
(We were lucky that the cheapest brand was even PINK!!)
Lipstick - Free
(They were all mine from those free things you get when you buy make up)
Makeup Remover Wipes pack of 25 - 1.99
( I put a few in zip-locks for the girls to take home to actually wash their make up off with.  When they wanted to redo their make up during the party we just used my Homemade Baby Wipes!  The make up center just happened to be next to where we change diapers!)
Canopy over the Center - 2.50 from the Thrift Store
(It will go over her bed after the party!)

 After faces came nails!  I set out paper towels so they wouldn't get my bed sheet... I mean... Very expensive party table cloth... dirty.  I did end up helping them the most here.  They all had very interesting ways to paint nails.  It was cute!
Cost
2 Packs of Nail Polish - 1.00 each
Stick on Princess Earrings - 1.00
(These both came from the Target Dollar bins!)

Next to come was their cute socks, but... they were busy sitting on the couch with hands in the air from wet nails!  Imagine 6 little girls in Tu Tu's, with their hands up, blowing on their nails and semi-watching Barbie and the Diamond Castle.  Yeah... they had me just slip them on their feet like the were Cinderella!
Cost
5 Pairs of Socks - 1.00 Each
(Dollar bin at Target)

Total Cost was 26.90!!!

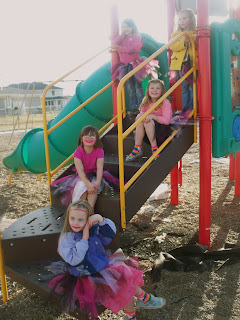
After cupcakes, make up, dry nails, and presents we went out side.  The girls were shocked I was letting them out of the house in the crazy makeup and Tu Tu's!  They had a BLAST at the park!  Here are a few pics from the fun!