Monday, August 30

Creative Traditions Giveaway!


Today I would like to welcome Jennifer Bass of Creative Traditions!  *Round of Applause please...*

I was delighted to discover that Creative Tradition is actually a mother-daughter team!  *Awe* Mother, Jeanine, made a habit of sewing quilts to commemorate special life moments, as well as other things,  while Jenn is a jack of ALL trades.  She doesn't only sew.  She also works with fractal artwork, photography, cartooning, interior design, landscape design, and culinary delights.   Creative Tradition is a truly a treasury of handmade items you will want to use everyday!  I just love meeting new talented people and am honored to have teamed up with such wonderful women!
Here are some my my favorite creations from them!


Now... I don't wear a bib, but I must admit... if Jenn made an adult size Bumblebee bib... I would wear it!  lol  For now I must be satisfied with her adorable Baby Size bib which Jenn was kind enough to share with you all!  Want to know how to win this one-of-a-kind creation?  Read on my friends!
Please don't forget that for each qualifying entry, you must comment ON THE BLOG!  Also, be sure to leave a way for me to get a hold of you if you win!

1) Head over to the Creative Tradition Etsy Shop and leave a comment about your favorite item! (1 Entry)

2) Invite 5 friends to the SherbertCafe or Creative Traditions Facebook page. (1 Entry each time)

3) Follow SherbertCafe or post our button to your blog! (1 Entry)

4) Blog or Facebook about our giveaway! (1 Entry)


*Sprinkling good luck upon all of you!*

Sunday, August 29

Water Bottle Koozi!

So for Kindergarten they have asked that the parents send money for a snack milk, or.... a bottle of water.  Well, my daughter hates the taste of "cow milk" and drinks soy, sooooo.... Snack water it is!  After only 2 days of labeling her water with her name I got lazy.  I can never find my sharpie and have felt lucky to find it those 2 times!  So, being "lazy" I decided to make her a water bottle Koozi!
Being lazy... I didn't measure my bottle, but simply wrapped the fabric around the bottle until it was about 3 inches overlapped.  I then cut there and figured out my height!  I also cut on the fold so that I would have one less side to sew!
I then cut some thin batting to  the same size for some sort of insulation and stuck it inside.
I used some left over bias tape and pinned it to the outside two edges.  I would have done all three, but I didn't have enough!
After sewing that I found a Yo-Yo and matching button for my clasp "hook".
I flipped it over and on the other side I folded it in about half an inch and sewed that down.
Then measured a piece of dowel to stick inside so that it wouldn't collapse here.  (You will see what I mean when you see how I got it to close.)
I had some cute frilly elastic like ribbon.  I did one short and one long in case I ever used a larger bottle.  If I had velcro I would have used it, but....  I didn't!
I used some puffy paint to write her name on the outside.  I put it over the bottle to keep it straight!   And I was done!
Here is the clasp portion.  I put both the long and short elastic over it so it wouldn't dangle!  Pretty sure she now has the cutest "snack" water ever!


Friday, August 27

Bag Tags

OK... I did this VERY quickly the night before school started.  It turned out cute and I decided not to redo for 2 reasons... A) I was tired and didn't want to fix it.   B) She is in Kindergarten... nobody will notice and it's gunna get ruined fast anyways!

So... Part of the school list was that the Kindergartners have tags on their bag that have their name, address, teacher, room #, and what bus or if they are being picked up.  I couldn't do something simple... so.....
Here is the stuff I used.  My flower came precut and there are 2 circles there.
First I traced my flower onto some iron-on adhesive.
Then... I ironed my flower to it.
Peel off the paper backing...
Ironed to the front of one circle!
Now... for some reason this is the point I decided to label it.... which presented a problem cause then I had to edit more photos!  I love you all, but... you don't need to know her teachers name, room number or our address....  I stil love you though!
I then blanket stitched around the flower to give it some pop!
The pic is hard to see, but I then place the ends of the ribbon where I wanted then in the end... this is the part that hangs from the back pack!
I then placed my 2nd circle on top with right sides facing and sewed around the edges, but left a tiny part open so I could turn it right side out!
See... right side our and sewn!
So... then I choose to blanket stitch along the outside with more embroidery floss, but... I think it made it look a little toooooo... home made?  I dunno... but I was tired and done so I didn't care!  lol  Much cuter still than your average bag tag!


Saturday, August 21

The Old Navy Necklace WINNER!

Ok... so... I know that not many people put in for the contest, but... I have faith and I KNOW that next time will be even greater!  Perhaps my internet won't mess up and the contest will start on time next time!    Anyways....

By way of Random.org.... the winner for my very first giveaway is...

Comment #5  Janice S., who said, "I love the pink one! So cute. When you say floss is that just a fancy word for thread or do I need to actually look for something with that name on it? You know I am crafty! hahahahahaha"


To answer her question it is embroidery floss... it comes in packs that look like this!
Image via Kaboodle.com

Thank you to all who commented!  Look forward to more giveaways in the future... I'm pretty sure I have one lined up for next Saturday!

Tuesday, August 17

Smily Cupcake on a Stick

We had a David and Goliath lesson on a Fast Sunday and we were going to chuck marshmallows at Goliath's head.  I was going to let them eat the marshmallows until one kid pointed out that it was a fast sunday!  I promised that if they didn't eat them I would bring them a treat the next week.  They did as promised!  I know how hard that was for them so I felt like they needed an extra special treat!

Here is everything you will need to create these.
Start by making and cooling your cupcakes.  Notice that I didn't use cupcake papers.  I also decided to use thinner cupcakes.  Just one giant scoop of batter.  The bigger ones were to heavy.
Next you just follow the directions on your melting chocolate.  I went with blue because I was shopping with my son!  lol  I like the wilton brand... mostly cause it's the easiest to find where I live!
 
Before you do this make sure you have a place on your counter where you can set these to dry.  I just place mine on wax paper.  Here is a picture of me dipping the end on my pretzel into the chocolate.

I then stuck it into the side of the cupcake for super strength hold!

Here is the first batch all lined up and cooling.
To cover the cakes I held the dried creation over the bowl of warm gooey chocolate and spooned a giant glob over it.

I then used my spoon to smooth the chocolate all over the cake to seal it in!
This is what happened when I stuck the whole cake into the chocolate!  Smoother look, but... I couldn't get it out very good!  Also...... perhaps you are smarter than me, but just in case.... don't bang your pretzel stick on the side to shake of the excess chocolate... it will break your pretzel!

Here they are all cooling!

For the faces I warmed 1 1/4 cup chocolate chips with 2 TBL shortening.  I'm not to fancy... I just poured it into a ziplock bag and snipped a tiny corner.  I suppose you don't have to do faces, but... they are so cute right!

Here are a few ones I tried with the giant ones after I knew I have enough for my class.  Playing is fun too!  Plus... my kids loved them.  I think the big ones were a pain to eat.  They fell off really easy.

My son is a sucker for chocolate...  this one was mostly chocolate cause I ran out of the fancy blue!

Sunday, August 15

Old Navy Inspired Necklace AND GIVEAWAY!

My very first giveaway shall be a necklace!   *Crowds cheering and ooooing in ah*  Not only any necklace though... an Old Navy Inspired Necklace!  So... read the tutorial and see how to win a beautiful necklace made by me, or... don't... just read the tutorial and make one yourself, but...  why would you do that when you could get one for free?
Picture via Polyvore.com

I have seen these other places, but the one place I really remember is Old Navy!  I love the idea of this necklace!  They are so pretty!  My only deal is when I saw it I thought... "I could make that."  So I did.  I have usually seen them with beads the same size as the ribbon and they are usually done on a much larger scale.

I decided to see how these would look on slightly smaller scale.  I must say that the first one I made turned out magnificent!  Here is how to make em!
To start you will need embroidery floss, beads and at least 4 feet of ribbon That length will also depend on the size of your beads.  I would just keep you ribbon on the spool to be safe!
I started about 12 inches down from the tip of my ribbon.
Using a whole piece of embroidery floss I tied a double knot at the end and threaded through one bead and the ribbon.  (I just noticed that this picture is backwards.  Be sure that your needle is going the other direction!  Bead to ribbon.  lol
I then used a smaller matching bead and went through it, around and then back through the first bead.
This picture I took just so you could see what was going on better.  I wrapped the ribbon around to the other side of the bead and right where the hole would be when you wrap it... Poke your thread through. Then back into another bead.
Just keep going in this fashion.  Threading a bead and wrapping the ribbon.
At the end... Do the same thing to finish... only this time when poking through the last bead and then the second to last.  Using your needle wrap your thread around the thread inside this.  
To finish it off I burned the ends slightly so they wouldn't fray.  And to put it on I just tied it into a pretty bow!
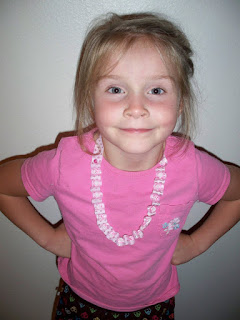
Such a pretty necklace... and a pretty model!
Here is what it looked like from the side.

AND NOW FOR THE GIVEAWAY!  
You will be trying to win one of these 3 necklaces.  You may choose between the Pink.
This Brown.  (It's made from a thinner ribbon.)  I also just noticed what an awful picture this is!  Much prettier in person.  The beads are slightly reddish.
Or this Black and Cream one.  (I tried using a very tiny thin ribbon for this one.  It still cute, but I think I personally like the thicker ribbon.)  

To enter you must leave a comment!  One for each of the following reasons, so you get more than one entry!

1) Follow my blog!


3) Blog or Facebook about my Giveaway.

4) You may also get 1 entry for every 5 friends you invite to "Like" my facebook page.

5)Another entry for commenting on your favorite Sherbert Cafe idea!

Good Luck!  The contest will go through until next Saturday!