Wednesday, June 30

Fancy French Braid Ponytail

Ok... My little girl had this idea for a hair do and then at the last minute we changed it.  It was supposed to be a french braid with a long ponytail and 2 buns, but she liked the look before we got to the bun part.  I must admit.. It's pretty cute!
First divide the hair into three sections.

French Braid the middle section down to where you want your ponytail, then regular braid the rest of the way.  I don't have a picture of this step, but then pull the rest of the hanging hair and the braid into a ponytail.
Now divide the right side in half, perpendicular to the french braided section.  Pull the top half over the main ponytail and the bottom half under and pony they together on the opposite side.

Do the same with the left side!  Here is where I was going to make 2 buns, but we thought it looked cool! So...

We just added her bow!  I like how full this makes her ponytail seem.
Here is a side view!  Simple and sweet!

Saturday, June 26

Mini Hearts with a Pony

This is a cute and easy way to spice up a boring ponytail!
Start by making 3 little piggies and keep the bases of them VERY close to the crown.
Then do pull threws on all of them upside down... (Just make sure they are still hanging in her face!
Next I made small piggies directly behind the main ones.  These are really just to place the next strands in.
Next you are going to seperate the main piggies in the front in half and twist them in opposite directions. Tack them in the pony behind to create the heart shape!  
Do this on all three and put the hair up into a ponytail!  Making sure to add a cute ribbon cause... it's just cute!  This is pretty much a smaller version of the Triple Heart Ponytail I did two weeks ago... I was just trying to figure a way to make the hearts... smaller and sweet!
We are having so much fun with our new way to bond!  So girly!


Friday, June 25

Fabric Square Flowers

After making all those Yo Yo Flowers for the Changeable Flip Flops I decided to try something different!
These are fairly simple.  All you need is 5 squares for each flowers.  I cute mine into 4 inch squares.
Fold in half.
Hand sew closed.
Pull closed, but don't try and get all smart and knot your string yet!
Go ahead and add on another triangle!
See!  Pulled tight again!  Do this with all five triangles.
When all 5 triangles are done, connect them to the first!
Add a something to the middle!  Button... smaller flower maybe or a yo yo!

Wednesday, June 23

Barber Shop Ponytail

Here is another post in the Helmet Hair Series!  We were looking for something QUICK!  It had been a busy morning....

I started by placing a row of connecting piggies down one section of her head.  It is easier to do this if you part the hair and place it in temporary ponies.  I just didn't take a picture of that because... like I said... we were in a hurry!

Next gather all the hair into one ponytail.
Here is the Barber shop part.  All I did was start by tying a long piece of ribbon to the top pony...
And then quickly loop it around and around in hopefully evenly spaced sections!
I finished it by tying it into a bow at the bottom!  It worked great under her helmet.  Honestly if I had more time I would have done mirrow pigtails instead of one pony.  I did this on the side and the opposite side had several loose hairs at the end of the day!  I just figured we were going for the wind swept look!

Tuesday, June 22

A Pony Tail with a Big Heart!

No... not that the pony tail has a beating heart.  You are going to create a Big Heart near the ponytail!  lol  I'm so funny!  This is another one that is great for Helmet Hair!

Start by creating 3 sections on the top of her head, making sure you leave some hair in a small section above her ear... we will get to that later.  The 3 sections can be braided, Unicorn twisted, of just pulled back into piggies!  BUT  the middle one needs to go back about level with her ear or even past!  If I had been thinking... which I wasn't... I would have made the middle section go to a point in the back... would have made this look more like a heart, but still cute!  The other sections next to it need to be half the length.  When creating them just split that middle one in half and connect that remaining hair to the others.
Here is a view from the side.  You are pretty much just going to connect and link all the ponies from here.  Gather the remaining hair above her ear and add it into a piggie on the side.  I made sure that this one was even closer to the front that the others.

Here is another view from the top at this point.  You can see why creating a point with that first middle section would have looked cuter, but again... I still think it's cute!

OK... back to the side views.  See... I just sectioned out some more hair and I'm going to take that other piggy and add it, making sure that this one is low and following a heart shape pattern!

I pulled out one more section on each side here and left a triangle shape at the bottom.

Then gather them all onto one to finish off the pony!  YEAH!!!  Easy Wheezy and CUTE!

Monday, June 21

Melly Apron


My friend, Melly, had on of these at her home!  This is such a cute idea to dress up that boring bottle of dish detergent that always sits on your kitchen counter!  I stole it, well... I guess borrowed since she knew that I had it, and made a pattern to share with the world!  EVERYONE MUST HAVE WELL DRESSED DISHSOAP!!!!!  When doing the cleaner photoshoot I realized that I did not have a large dishsoap I use a small!  So...  this picture is with window cleaner AND  I will be creating a small one later! lol

To start just download the pattern I created by clicking here.  Remember to be creative when making this!  Add what ever kind of fru fru you would like!  This is also a great pattern to use up scraps.  It has a pocket in the front where you can keep a scrubby?  I dunno... who cares about functionality.  It's way cute!

Thursday, June 17

Twilight Flip Flops!

Are you ready from a hair post break!  I'll bet you are!  Sorry... you are going to have to deal with the hair post a little while longer.  I still have about 40 hours a week of school on the computer to finish!  Hair posts are the easiest since... well... you have to fix hair right?  I mean... what if the world fell apart cause you didn't!

Anyways... I had my 2 lovely babysitters over to help with the kids so I could be glued to the computer.  As payment I showed them a few crafty tips and we created these twilight flip flops!!!  Thank you Billie and Karen!  My plan was to help them create a flip flop they could switch out the "bling" on.  While we all love Twilight you might not want to wear them on your feet everyday.  (Or maybe you would...!)  I've had this idea for a while and here was my chance to see how it planned out! 

Here are our flip flops before.  Boring right!  We started our flip flop make over by hot gluing cute black ribbon to the tops straps.  (Remember... our plan was to keep them simple so that we could switch our several different flowers!)  Also in this step we hand sewed a velcro square to the place where our toes squish in!  After you complete this you can embellish you flip flops with pretty much whatever you can sew velcro onto!  Now... onto the twilight part.
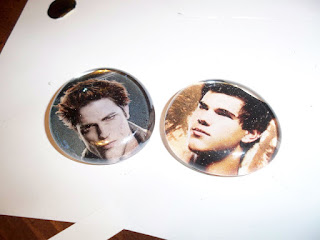
Oh so handsome right!  First decided you want on your feet and select their photos from the internet and print.  You don't want the pictures to print any larger than an inch.  But... this will depend on how big the gems are that your put over your pictures. I don't take sides so I did one of each.  To create these follow the post on our sight here!  Just don't do the magnet portion.   If you want to stop here then just glue a piece on velcro where you would glue your magnet!  
Karen did something similar, but wanted to use bottle caps.  Just follow the same steps and make sure you cover the tops with the glue to so they will stay pretty!
We backed our men with some Yo-Yo flowers.  They are easy and don't take much fabric.  Remember, again, the plan was to make several so we could switch the out!  A tutorial on how to make the Yo-Yo's is here!  We embellished away after that. 
Here are Billie's!  With an extra gem shown on the flip flops!
Here are mine with just a regular gem and velcro.
Here are Karen's!  Notice on her's she put the cute black ribbon around the edge instead!  I wished I had bought more!
See, we aren't totally obsess with Twilight!  I even decorated some for my little girl!
Here is a close up of the velcro on the backs.  For the flowers we hand sewed them on.  The plain gems are the Goop Glue shown in the magnet tutorial.  And on the Flip Flops... well they are really more tied on since we didn't stitch through the flip flop itself.  I stitched the edge and the went under the strap to the other side of the velcro and then back again.
 
A word from the wise.  When creating interchangeable Flip Flops have lots of supplies as it can be addicting!  Notice that Karen has about 4 different ones in front of her in the picture and Billie has 6!  I think they liked them!


Sunday, June 13

Pull Through Ponytails (Topsy Tails)

OK... so someone asked me at church how to do the pull through ponies from the Triple Heart Ponytail a few days ago.  Somehow I couldn't quite explain so.... here is a post for those of you who didn't know how to do that!  Sorry...
These pull through ponies are an easy way to hold back stray from wisps or do one giant one in a pony to spice it up a bit.  For this tutorial I ended up doing a row of tiny ones to spice up a half pony.

Start with a loose pony.
Divide between the scalp and pony holder in half.
Flip the strand of hair forward through the hole there.
Push through!
Pull.....
Pull...
Then sinch tight!
I did a row of them and put remaining ponies into a half pony!
So cute right!